When exporting data from your portal you may run into some issues with your pop-up blocker. To enable pop-ups from your portal:
For Google Chrome
When Google Chrome blocks pop-ups for you, the blocked pop-up alert icon  appears in the address bar. If you click on the icon, you can see the pop-ups that have been blocked for that page. If you'd like to allow pop-ups for that specific site:
- Click the pop-up alert icon
- Click the link for the pop-up you'd like to see
- To always see pop-ups for the site, select "Always show pop-ups from [site]."
If you'd like to proactively allow pop-ups for specific sites:
- Click the Chrome menu
in the top right hand corner of your browser
- Select Settings
- Click Show advanced settings
- Under the "Privacy" section, click the Content settings button.
- In the "Pop-ups" section, select "Do not allow any site to show pop-ups."
- Click the 'Manage exceptions' button
- Type in the url of the site that you'd like to allow pop-ups from
For Firefox
To access the pop-up blocker settings:
- Click the menu button and choose .
- Select the panel.
- Under the Permissions section, uncheck the box next to Block pop-up windows to disable the pop-up blocker altogether.
- A click on opens a dialog box with a list of sites that you want to allow to display pop-ups.
- The dialog box opens and then select Allow: Click this to add a website to the exceptions list.
For Microsoft Edge
- Open Edge.
- Click the More button in the top right (the one with the three dots).
- Click Settings | Cookies and Site Permissions
- Under All permissions, select Pop-ups and redirects.
- Go the Allow section, and then select Add.
- Type in the URL that you want to allow to create pop-ups into the dialog box (starting with the https:// portion at the beginning) and select Add. The URL should now appear in your Allow list.
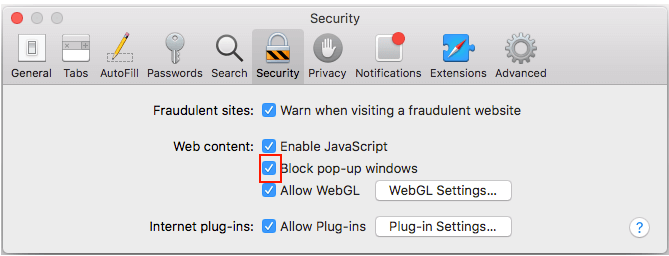
For Safari:
- Windows users select “Safari” > “Preferences“.
- Click on “Security” at the top of the window.
- Check the box “Block pop-up windows” to enable this feature. Uncheck it to disable it.
Comments
0 comments
Please sign in to leave a comment.